Straightness of precision
tubes refers to the degree of deviation of the tube's axis from an
ideal straight line along its entire length. It is usually expressed as the
ratio of the maximum bending value to the tube length, commonly measured in
mm/m or mm/total length. Straightness not only affects subsequent processing
performance but also directly relates to assembly accuracy, equipment lifespan,
and system operational stability, especially in demanding fields such as
hydraulics, automotive, and machinery manufacturing.
What is the Straightness of Precision
Tube
The core dimensional accuracy indicators of
precision tubes include outer diameter accuracy, wall thickness accuracy,
roundness, straightness, and concentricity. The straightness of a precision
tube refers to the degree of deviation of the tube's centerline along its
length. The quality of straightness affects the processing, installation, and
use of precision tubes.
Straightness vs. Roundness vs.
Concentricity of Precision Tubes
Straightness controls the tube's axis,
reflecting whether the entire steel tube is bent, affecting assembly,
processing, and automatic feeding.
Roundness controls a single cross-section,
reflecting whether the cross-section is close to a perfect circle, affecting
sealing performance and fit accuracy.
Concentricity control measures the inner
and outer circular axes, reflecting the uniformity of wall thickness and
affecting pressure resistance and lifespan.
Standards of Precision Tubes
Straightness
Common standards for the straightness of
precision tubes include EN
10305 standard , ASTM A519-06 standard, and JIS G3445 standard.
|
Standard
|
Standard Name
|
Straightness Description
|
|
GB/T 3639-2009
|
Cold-drawn or cold-rolled precision
seamless steel tubes
|
Provides straightness control
requirements, usually expressed in mm/m.
|
|
EN 10305 Series
|
European precision steel tube standards
|
Provides explicit geometric tolerance
requirements for cold-drawn
precision tubes.
|
|
ASTM A519
|
Seamless machine tubes
|
No mandatory uniform values; mostly based
on supply and demand agreements.
|
|
JIS G3445
|
Carbon
steel pipes for mechanical structures
|
Provides requirements for dimensional
quality and straightness.
|
|
ISO 3304
|
Cold-drawn precision tubes
|
Specify outer diameter, wall thickness,
and straightness grade.
|
Precision Tubes Straightness Tolerance
The straightness tolerance of precision
tubes refers to the maximum permissible deviation between the axis of the steel
tube and an ideal straight line, usually expressed in millimeters per meter
(mm/m). Common tolerance ranges are as follows:
1. Ordinary Precision Tubes
Straightness tolerance is generally
0.5mm/m~1.5mm/m (refer to GB/T 3639-2009 "Cold-drawn or cold-rolled
precision seamless steel tubes").
2. High Precision Steel Tubes
For tubes used in hydraulic cylinders,
tolerances are more stringent, typically requiring 0.3mm/m~0.8mm/m (refer to
ISO 3304 standard).
3. Special Purpose Steel Tubes
For tubes used in aerospace or precision
instruments, tolerances may be lower than 0.2mm/m, depending on customer
requirements.

How to Test the Precision Tube Straightness
1. Straightedge + Dial Indicator Method
(routine factory inspection)
Place the precision tube on a
high-precision straightedge or V-block. Move the dial indicator along the
length of the tube and record the maximum runout value.
Judgment Formula: Maximum runout value ÷ Measurement length (m)
This method is low-cost and simple to
operate, but is significantly affected by human factors and its efficiency is
generally low.
2. Laser Rangefinder Method
This method uses a laser rangefinder to
measure the position of various points on the axis of the steel pipe, and
obtains the straightness result through data analysis.
This method has high accuracy and speed,
and is suitable for rapid inspection in mass production.
3. Wire Pulling Method
Thin wires are fixed at both ends of the
precision pipe, and the straightness is evaluated by observing the deviation
between the wires and the axis of the steel pipe.
This method is simple and easy to
implement, but its accuracy is relatively low. It is only suitable for rough
judgment and is not recommended for final inspection of precision pipes.
Factors Affecting the Straightness of
Precision Pipes
1. Raw Material Selection
The selection of raw materials in precision
pipe production is the basis for straightness control. If the shape, size,
hardness, and chemical composition of the raw materials do not meet the
standard requirements, it will affect the straightness of the pipe.
2. Heat Treatment Technology
The heat treatment technology in the
precision pipe production process also affects the straightness of the pipe.
Tempering or annealing techniques are usually used to improve the straightness
of the pipe. However, improper heat treatment can alter the original
straightness of the tube.
3. Manufacturing Process
Processes such as drawing and precision
rolling in precision tube production also affect the straightness of the tube.
Inappropriate manufacturing processes, substandard equipment, or improper
operation can all negatively impact the straightness of the tube.
How to Improve the Straightness of
Precision Tube
1. Optimize Raw Material Selection
Use high-quality raw materials with stable
quality and uniform internal stress, strictly controlling the chemical
composition and microstructure uniformity to fundamentally improve the
straightness of the precision tube.
2. Improve Processing Technology
Optimize the parameter settings and
operation methods of rolling, drawing, and straightening processes. Reasonably
design the cold drawing deformation amount, configure multi-roll straightening
equipment, and control the rolling and drawing speeds to reduce deformation and
stress concentration during processing.
3. Improve Heat Treatment System
Strictly control parameters such as
temperature, time, and cooling rate during heat treatment, employing
stress-relief annealing to ensure that the precision tube maintains good
straightness after heat treatment.
The Importance of Straightness
Inspection in Precision Tube Production
Straightness inspection is a crucial step
in the production
process of precision tubes. It not only ensures that the quality of the
steel tubes meets standard requirements but also allows for the timely
detection of problems during production, providing a basis for improvement and
optimization.
Through strict control of raw material
quality, optimization of production processes and equipment, strengthening of
testing methods, and implementation of a quality monitoring system, it is
possible to ensure that the straightness of precision tubes meets standard
requirements, providing high-quality raw material guarantees for the
manufacturing of high-precision mechanical parts and transportation.
FAQ
1. What problems will non-compliant
straightness of precision tubes cause?
Out-of-tolerance straightness may lead to:
CNC machining vibration or abnormal tool
wear;
Automatic feeding and cutting equipment
jamming;
Assembly deviations, decreased coaxiality;
Increased costs of finished product scrap
or rework.
Straightness issues are particularly
prominent for long-length precision tubes.
2. Is there a difference in straightness
between cold-drawn and cold-rolled precision tubes?
Cold-rolled precision tubes: Dimensional
stability and straightness are easier to control.
Cold-drawn precision tubes: Straightness is
ensured by subsequent straightening processes.
Whether there is a significant difference
between the two depends on the equipment level and straightening capacity.
Conclusion
The straightness of precision tubes is not
only a geometric indicator, but also a comprehensive reflection of
manufacturing capabilities, process control, and quality systems. Through
strict raw material management, scientific processing techniques, stable heat
treatment systems, and reliable testing methods, the long-term stable operation
of precision seamless steel tubes in high-end applications can be ensured.




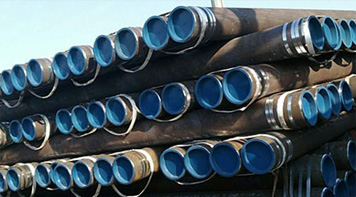 Eastern Steel Manufacturing Co.,Ltd not only improve product production and sales services, but also provide additional value-added services. As long as you need, we can complete your specific needs together.
