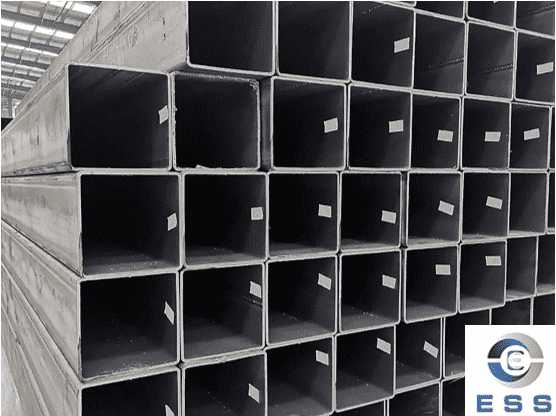
Square tubes (SHS steel) are widely used in various industries such as construction,
manufacturing, and automobiles. However, like other steel pipes, square tubes
also have some common defects that need to be detected and addressed promptly.
This article will discuss some common defects of square tubes and their
detection methods.
Common Defects of Square Tubes
1. Surface Cracks
Surface cracks are one of the most obvious
defects in square tubes.
These cracks may occur during the
manufacturing process, such as hot rolling or cold forming. They may also be
caused by external factors, such as improper handling or excessive stress
during use. Surface cracks can impair the structural integrity of the square
tube, leading to premature failure.
2. Welding Defects
Welding defects are a significant concern
for square
tube welding. Weld porosity, lack of fusion, and excessive weld
reinforcement are common problems.
Weld porosity refers to the presence of
small holes in the weld, which reduces the strength of the joint. Lack of
fusion refers to the weld metal failing to fully bond with the base material,
creating weak points. Excessively thick welds can lead to stress concentration,
affecting the overall performance of the tube.
3. Dimensional Deviations
Square tubes must meet specific dimensional
tolerances. Deviations in dimensions such as wall thickness, width, and length
may occur due to manufacturing errors or mold wear.
These dimensional deviations affect the fit
and function of the square tube in its intended application. For example, if
the wall thickness is too thin, the tube may not be able to withstand the
required load.
4. Internal Defects
Internal defects, such as inclusions and
delamination, although not visible on the surface, can significantly affect the
quality of the square tube.
Inclusions are foreign particles trapped
inside the metal during the manufacturing process. Delamination refers to the
separation of thin layers within the metal, which weakens the tube's strength
and makes it more prone to cracking.

Square Tube Defect Detection Methods
1. Visual Inspection
Visual inspection is the simplest and most
basic method for detecting surface defects in square tubes. It involves
carefully examining the tube surface with the naked eye or with the aid of
magnifying tools.
Trained inspectors will look for cracks,
scratches, and other visible defects. Visual inspection can also detect signs
of corrosion or damage that may have occurred during storage or transportation.
However, visual inspection has the
limitation that it can only detect surface defects and may fail to identify
internal defects.
2. Ultrasonic Testing
Ultrasonic testing is a non-destructive
testing method used to detect internal defects in square tubes.
Its working principle is to emit
high-frequency sound waves into the tube and analyze the reflected signals. If
internal defects such as inclusions or delamination are present, the reflection
of the sound waves will change, indicating the presence of defects.
Ultrasonic testing has high sensitivity and
can detect tiny internal defects that other methods may miss.
3. Magnetic Particle Testing
Magnetic particle testing is suitable for
detecting surface and near-surface defects in ferromagnetic square tubes. The
square tube is magnetized, and iron powder is applied to its surface. If a
defect is present, the magnetic field will be distorted, causing the iron
powder to accumulate at the defect, thus revealing it.
This method is fast and relatively
inexpensive, but it is only applicable to ferromagnetic materials.
4. Eddy Current Testing
Eddy current testing is another
non-destructive testing method used to detect surface and near-surface defects
in conductive materials (including square tubes). Its working principle is to
induce an alternating magnetic field inside the square tube, thereby generating
eddy currents.
Any eddy current changes caused by defects
such as cracks or inclusions can be detected and analyzed. Eddy current testing
is fast and can be used for high-speed inspection, but it may have limitations
in detecting deep internal defects.
5. Dimensional Measurement
To detect dimensional deviations, precision
measuring tools such as vernier calipers, micrometers, and laser rangefinders
are required.
These tools can accurately measure the length,
width, and wall
thickness of square tubes and compare the results with specified
tolerances. Dimensional measurement is crucial to ensuring that square tubes
meet relevant standards and are usable for their intended purpose.
Summary
Defect detection in square tubes ensures
the safety of the end user. Defective square tubes may break under stress,
leading to accidents and personal injury. By detecting and rejecting defective
tubes on the production line, we can prevent potential hazards. Defect
detection helps maintain product quality and reputation.




 Eastern Steel Manufacturing Co.,Ltd not only improve product production and sales services, but also provide additional value-added services. As long as you need, we can complete your specific needs together.
