Ultrasonic testing of ERW pipes
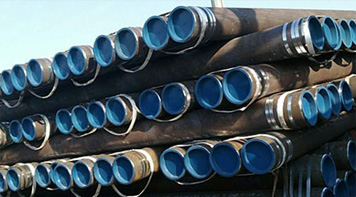
ERW pipes are made by utilizing the skin effect and proximity effect of high-frequency current to quickly heat the edge of the pipe blank to the welding temperature and then extrusion and welding. Compared with seamless steel pipes, ERW welded pipes have the advantages of high dimensional accuracy, low price and high production efficiency, and their grain size and structure density are better than seamless steel pipes; compared with submerged arc welded pipes of the same specifications, ERW welded pipes The production speed is fast, and there is no local thinning of the anti-corrosion layer at the welding seam. Its application areas include casings used in oil drilling and production, submarine oil and gas transmission pipes in the offshore oil industry, oil and gas transmission pipes and gas distribution pipes for trunk lines and urban pipeline networks, etc.

The welding quality of ERW welded pipes is the main factor affecting its performance. During the pressure test and use of ERW welded pipes, cracking and bursting events are mostly caused by welding defects. Therefore, the inspection level of ERW welded pipes should be improved, and the defects The detection rate is of great significance to ensure the quality of ERW welded pipes and the safe operation of ERW welded pipe pipelines.
A variety of welding defects may occur in ERW welded pipes. Some of these defects come from the base material and some are generated during the welding process. Different defects have different effects on welding quality. Area-type defects such as cracks and lack of fusion are prone to stress concentration under stress conditions, which is the main cause of low-stress brittle fracture of welds; while volume-type defects such as pores and slag inclusions are less sensitive to cracking than area-type defects , but the effective cross-sectional area of the weld is reduced, and the strength of the weld is reduced. Under the action of external force, these defects often become the source of cracks, which eventually lead to cracking of the weld.
1. Ultrasonic inspection during the production process of ERW welded pipes
Ultrasonic testing is currently the main non-destructive testing method in the production process of ERW welded pipes. Its main application areas include: 1) Ultrasonic online testing of steel plates. 2) Ultrasonic online inspection of weld seams after ERW welding and internal and external burr removal. 3) Offline inspection of ERW welds. 4) Ultrasonic testing of ERW welded pipe ends.
1.1 Ultrasonic online inspection of steel plates
The on-line detection of supersonic waves on steel plates generally uses twin-crystal or poly-crystal probes, coupled with water film or partial water immersion methods, and its main purpose is to detect layered defects in the steel plate parallel to the surface of the steel plate. There are two main scanning methods: one is parallel line scanning along the rolling direction; the other is that the steel plate moves in a straight line along the rolling direction, and the probe reciprocates perpendicular to the moving direction of the steel pipe to form a "z"-shaped scanning. Since the edge of the steel plate forms a weld seam in the subsequent ERW welding, the detection of defects at this point is particularly important in the ultrasonic testing of the steel plate. Relevant standards and specifications require 100% scanning of the edge of the steel plate. In actual work Generally, this is ensured by increasing the number of probes at the edge of the steel plate.
1.2 Ultrasonic online inspection of welds
ERW weld seam ultrasonic on-line inspection is carried out after welding and removal of internal and external burrs. It mainly includes two parts: one is to use A-scan or B-scan to detect the scraping effect of internal and external burrs. Compared with A-scan, B-scan can display in real time the appearance of the inner wall of the weld after the internal burr is removed, and the graphic display is more intuitive; the second is oblique incidence of longitudinal waves, and the use of shear waves generated by refraction in welded pipes to detect welding defects. Since the weld temperature is relatively high at this time, online inspection generally uses high-temperature probes and uses the local water immersion method.
1.3 Weld ultrasonic offline inspection and pipe end inspection
Offline ultrasonic testing of ERW welds is generally performed after hydrostatic testing and chamfering, and is mainly used to detect longitudinal defects in the weld and heat-affected zone. In order to improve detection efficiency, automatic detection is generally used. Due to the influence of the blind area at the pipe end in automatic detection. Afterwards, manual ultrasonic scanning of the welds is usually added. The content of pipe end detection mainly includes the detection of pipe end welds, layered defects in the base metal of the pipe end, and axial and circumferential defects. The detection of layered defects generally uses split probes, and the axial and circumferential defects in the weld and base metal and circumferential defects are often scanned with an oblique probe.
2. Selection of process parameters for ERW weld ultrasonic testing
Ultrasonic testing of ERW welds mainly includes two methods: automatic testing and manual testing. At present, the automatic detection of ERW welds mainly adopts two forms: wheel probe detection and local water immersion detection. Automatic detection has the advantages of high detection efficiency and fast speed, but it is not conducive to the precise positioning of defects and qualitative and quantitative analysis; in comparison, manual detection is more flexible, not only for precise positioning of defects, but also for Conduct qualitative and quantitative analysis of defects through echo characteristics and dynamic waveforms. Defects detected by automatic ultrasonic waves are generally further confirmed using manual methods. Process parameters that need to be considered for ultrasonic testing of ERW welds include refraction angle, sound beam width, and detection frequency.
2.1 Selection of refraction angle
Ultrasonic testing of ERW welds generally adopts oblique incidence of longitudinal waves, and generates shear waves through wave mode conversion in the workpiece and weld to achieve detection. The two basic conditions are: 1) Excite pure shear waves in the base metal and weld. 2) The transverse wave sound beam scans the inner wall of the steel pipe.
2.2 Selection of detection frequency
The frequency range of ultrasonic testing is wide, generally 0.5-10MHz. The selection of frequency should mainly consider the following factors:
(1) The sensitivity of ultrasonic detection is about half of the wavelength. Increasing the frequency is beneficial to finding smaller defects. In addition, the higher the frequency, the smaller the pulse width and the higher the resolution.
(2) High frequency, short wavelength, small half-diffusion angle, good sound beam directivity, and concentrated energy are beneficial to discovering and locating defects. But for the same chip size, the higher the frequency, the larger the near-field area, which is more detrimental to detection.
(3) As the frequency increases, the scattering and absorption attenuation of ultrasonic waves increase sharply, which is detrimental to detection.
During testing, various factors must be considered comprehensively and the testing frequency should be selected reasonably. For ERW welded pipes, the base material is generally hot-rolled coils with relatively fine grains. The width of the weld fusion zone and heat-affected zone after induction heating and extrusion molding is narrow, and its grain size is basically the same as that of the base material. In actual work, in order to obtain higher resolution, a higher frequency should be selected as much as possible under the premise of ensuring detection sensitivity, generally between 2.5-5MHz.
3. Reference test block
The reference test block is the basis for determining the sensitivity of ultrasonic testing of ERW welds. API 5L and GB/T9711 standards require the use of comparison test blocks with N10 grooves or 3.2mm vertical holes for ultrasonic testing of steel pipe welds. 100% of the body echo is used as the defect judgment standard.
4. Conclusion
(1) In the ultrasonic testing of ERW welded pipes, in order to ensure that pure shear waves are excited in the welded pipe and the inner wall of the welded pipe is scanned, the lower limit of the range of the shear wave refraction angle of the welded pipe is 33.2 degrees, and the upper limit varies with the inner and outer diameter ratio r/R of the welded pipe It changes with the change of r/R. The larger the value of r/R, the wider its range.
(2) When the sound beam refraction angle of the inner wall of the welded pipe is 45 degrees, it has high detection sensitivity for surface opening defects in the weld and heat-affected zone. However, in order to take into account the detection of radial area defects inside the weld, transverse wave acoustic beams with large refraction angles should also be used for scanning.
(3)The sound beam width of the shooting team should be considered comprehensively according to the refraction angle of the transverse wave and the diameter of the steel pipe. It is necessary to ensure that the upper edge of the sound beam does not excite surface waves in the welded pipe, and to avoid the occurrence of refracted longitudinal waves in the welded pipe.




 Eastern Steel Manufacturing Co.,Ltd not only improve product production and sales services, but also provide additional value-added services. As long as you need, we can complete your specific needs together.
