The ultrasonic probe can realize the mutual conversion between electric energy and sound energy, and the physical characteristics of ultrasonic waves when they propagate in elastic media are the basis of the principle of ultrasonic flaw detection of seamless steel pipes. The directionally emitted ultrasonic beam encounters defects when propagating in the tube, causing both wave reflection and wave attenuation. After the signal processing of the flaw detector, if the reflection method is used for flaw detection, the defect echo signal can be obtained, and if the penetration method is used for flaw detection, the defect signal can be obtained by the attenuation of the transmitted wave. Both can give quantitative defect indications by the instrument. Different types of ultrasonic waves can be excited in the tube using the piezoelectric effect or the principle of electromagnetic induction. Therefore, both piezoelectric ultrasound and electromagnetic ultrasound can be used for ultrasonic inspection of pipes. But electromagnetic ultrasound is only suitable for ferromagnetic materials.

Ultrasonic flaw detection method of seamless steel pipe:
1. The shear wave (or plate wave) reflection method (or penetration method) is used for automatic inspection in the state of relative movement of the probe and the seamless steel pipe. Only special large-diameter seamless steel pipes can be manually inspected.
Automatic or manual inspection shall ensure that the sound beam scans the entire surface of the pipe.
Note: During the automatic inspection, the two ends of the seamless steel pipe will not be effectively inspected, but this area should be controlled within 200mm.
2. When inspecting longitudinal defects, the sound beam propagates in the circumferential direction in the tube wall: when inspecting transverse defects, the sound beam propagates in the tube wall along the direction of the tube axis. portrait
Inspections for and transverse flaws shall be carried out in two opposite directions of the pipe.
3. When the purchaser does not propose to inspect the transverse defects, the supplier only inspects the longitudinal defects. After negotiation and agreement between the supplier and the buyer, the inspection of vertical and horizontal defects shall be carried out.
Can only be done in one direction of the tube.
4. In automatic or manual inspection, the coupling medium with good coupling effect and no damage to the surface of the seamless steel pipe should be selected.
Suspicious seamless steel pipes can be handled by any of the following methods:
5. Carry out repeated flaw detection inspection according to the method specified in this standard. If there is no defect signal or the signal amplitude is lower than the preset alarm level, this inspection is considered to be qualified.
6. After the visible defects of the suspicious parts are removed, if the size of the seamless steel pipe is within the allowable tolerance range, the pipe shall be in accordance with the method specified in this standard.
method to re-detection inspection. If no defect signal is generated or the signal amplitude is lower than the preset alarm level, this inspection is considered to be qualified.
7. Carry out other non-destructive inspections on suspicious parts according to the methods and acceptance criteria agreed upon by both parties.
8. Excision of all suspicious sites.
9. Suspicious seamless steel pipes are rated as unqualified for this inspection.




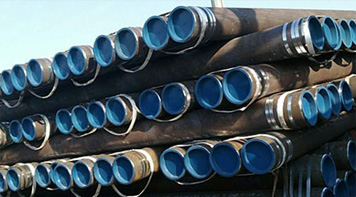 Eastern Steel Manufacturing Co.,Ltd not only improve product production and sales services, but also provide additional value-added services. As long as you need, we can complete your specific needs together.
