Nondestructive testing methods for welded pipe

In the manufacturing and use of welded pipes, non-destructive testing to ensure the quality of welds is particularly important.
Common non-destructive testing methods for welded pipes include: offline full-body magnetic leakage testing, eddy current testing and ultrasonic testing for more than 5mm from the surface of the welded pipe;Online magnetic leakage testing and eddy current testing to verify the welding quality more than 5mm from the surface of the welded pipe; offline full-body ultrasonic testing for thick-walled welded pipes; ultrasonic testing to verify the welding quality of thick-walled welded pipes.
Full-body magnetic leakage testing of welded pipes
Magnetic leakage testing refers to a non-destructive testing technology that detects defects by detecting the leakage magnetic field when the surface and near-surface defects of ferromagnetic materials form a leakage magnetic field on the surface of the material after the material is magnetized.
Magnetic leakage testing does not require high surface conditions of the pipe material, and the detection depth is large. It is widely used in foreign welded pipe inspections, and has also been widely adopted in China, especially for the inspection of oil welded pipes.
In production inspection, there have been cases where leakage magnetic flaw detection failed to detect large holes through the wall of welded pipes. In addition to management and personnel factors, this is related to the performance of instruments and probes, and the size and shape of defects.
The main factors affecting the accuracy of leakage magnetic flaw detection of the entire welded pipe are as follows.
1. Magnetization intensity
When the magnetization intensity is low, the leakage magnetic field is small and increases slowly; when the magnetic induction intensity reaches about 80% of the saturation value, the peak value of the defect leakage magnetic field will increase rapidly with the increase of magnetization intensity, but when the ferromagnetic material enters the magnetic saturation state, the increase of external magnetization intensity has little effect on the defect magnetic field intensity. Therefore, the design of the magnetic circuit should make the material under test reach a near-saturation magnetization state as much as possible.
2. Direction, position and size of the defect.
The direction of the defect has a great influence on the accuracy of leakage magnetic detection. When the main plane of the defect is perpendicular to the direction of the magnetization magnetic field, the leakage magnetic field generated is the strongest. When the same defect is located on the surface of the pipeline, the leakage magnetic field is the largest, and it gradually decreases with the increase of the buried depth. When the buried depth is large enough, the leakage magnetic field will tend to zero. Therefore, the wall thickness of the welded pipe that can be used for detection is generally 6~15mm; when the sensitivity is reduced, the detectable wall thickness is 20mm.
The size of the defect also has a great influence on the leakage magnetic field. When the defect width is the same but the depth is different, the leakage magnetic field increases with the increase of the defect depth, and the two are approximately linear within a certain range. The effect of the defect width on the leakage magnetic field is not a monotonous change. When the defect width is very small, the leakage magnetic field tends to increase with the increase of the width; but when the width is large, the width increases, and the leakage magnetic field decreases slowly.
3. Lift-off value
When the lift-off value exceeds 2 times the crack width, the leakage magnetic field intensity decreases rapidly with the increase of the lift-off height. The design of the sensor bracket must keep the lift-off value of the probe constant when scanning the surface of the steel pipe to be detected, generally less than 2mm, and often 1mm.
4. Flaw detection speed
During the flaw detection process, it should be carried out at a uniform speed as much as possible. Different speeds will cause different shapes of leakage magnetic signals, but generally will not cause misjudgment.
5. Surface quality of welded pipes
The thickness of coatings such as paint on the surface of welded pipes has a great influence on the sensitivity of flaw detection. As the thickness of coatings increases, the sensitivity of flaw detection drops sharply. From the current instrument performance, when the coating thickness is ≥6mm, effective defect recognition signals can no longer be obtained. The difference in surface roughness of welded pipes causes the lift-off value between the sensor and the inspected surface to change dynamically, which will affect the consistency of flaw detection sensitivity. In addition, it will cause system vibration and bring noise, so the surface of the welded pipe to be inspected should be as smooth and flat as possible. Oxide scale and rust on the surface of welded pipes may also generate false signals during the flaw detection process, which should be confirmed or re-inspected in time.
Eddy current flaw detection of the entire welded pipe
The characteristics of the eddy current flaw detection method are:
1. No coupling agent is required and it can be carried out non-contact;
2. The flaw detection speed is fast and can realize online production (up to 3 m/s, 2m/s in normal production), and the time for adjusting and changing specifications is short (generally 10-20min);
3. The welds of high-temperature welded pipes can be inspected;
4. The flaw detection results are highly reliable. Due to the fast eddy current flaw detection speed, the through-type coil eddy current flaw detection method has been widely used for many years to detect the quality of welded pipes, especially its density, but it is difficult to detect longitudinal cracks in the welds of ferromagnetic welded pipes.
Therefore, in high-standard eddy current flaw detection, the probe coil eddy current flaw detection method is generally used. For the "internal burr adsorption" that often occurs in the welds of welded pipes, eddy current flaw detection equipment often misreports it as a defect.
Frequent occurrence of eddy current flaw detection process, the internal burr is adsorbed on the weld due to electromagnetic force, and after leaving the eddy current magnetic field, the steel pipe contacts the automatic demagnetization device, and the internal burr automatically falls off after no magnetic attraction, and then the manual re-inspection is performed without defect display.
Due to the influence of the skin effect, as the distance between the inspected welded pipe and the detection coil increases, its detection sensitivity will gradually decrease. Therefore, for defects of the same size, the signal amplitude reflected by the inner wall of the pipe will be smaller than the defect on the outer wall of the pipe.
The ability of the eddy current flaw detection equipment of the whole pipe body of welded pipe in detecting defects on the outer and inner surfaces of welded pipes is determined by many factors, but the most important one is the wall thickness of the inspected welded pipe, the eddy current excitation frequency and the magnetic saturation intensity; at the same time, when selecting the instrument parameters, the influence of physical parameters such as the conductivity and magnetic permeability of the inspected welded pipe on the accuracy of eddy current flaw detection should also be considered.
Ultrasonic flaw detection of the whole pipe body of welded pipe
Ultrasonic flaw detection of the whole pipe body of welded pipe is mainly divided into direct contact method and liquid immersion method.
1. Direct contact method
There is a very thin layer of coupling agent between the ultrasonic probe and the detection surface of the test piece, so it can be regarded as direct contact between the two. The direct contact method is easy to operate, the flaw detection pattern is relatively simple, the judgment is easy, and the sensitivity of defect detection is high. It is the most commonly used method in actual flaw detection. However, this method has high requirements on the accuracy of the detection surface of the test piece to be tested.
2. Liquid immersion method
The method of immersing the ultrasonic probe and the workpiece in liquid and using liquid as a coupling agent for flaw detection is called liquid immersion method. The coupling agent can be oil or water. The liquid immersion method is divided into full immersion and partial immersion. This method is suitable for test pieces with rough surfaces. The probe is not easy to wear, the coupling is stable, the detection results are repeatable, and it is easy to realize automated flaw detection. However, the propagation attenuation of sound waves in the pipe wall in the liquid immersion method is very serious. A better solution is to use the water film method instead of the water immersion method for acoustic coupling.
Ultrasonic flaw detection of welded pipe welds
1. Offline flaw detection of welds
The welded pipe is sent to the flaw detection area by the transmission roller, and the rotating roller is raised. The weld of the steel pipe is manually rotated on the roller to a certain point of the weld. The flaw detection trolley is running, and each group of probes falls on the welded pipe in sequence with a time delay. The coupling agent for flaw detection is the emulsion of the welded pipe production line, which receives the sensor signal and automatically sprays on the weld and both sides. Because the ultrasonic offline system is arranged after water cooling and air cooling, the influence of weld deviation becomes very important. Therefore, in the offline flaw detection of welds, two groups of 6 probes are used for the longitudinal linear defect detection of welded pipe welds, with 3 probes in each group, distributed on both sides of the weld, and bidirectional detection, occupying a total of 6 channels, and normal flaw detection can be performed within the range of 15mm of weld torsion (deviation).
The flaw detection coverage of a single longitudinal probe is 12.7mm in the vertical direction of the weld (6.4mm on both sides of the weld), and there is no blind area coverage in the direction of weld thickness (maximum 13.72mm) in the 12.7mm wide area in the vertical direction of the weld.
The detection of transverse linear defects and point defects of welds should also consider the small amount of torsion (deviation) of steel pipe welds.
Therefore, two groups of 6 probes are used, 3 probes in each group, distributed front and back. Even if the weld is twisted (deviated), the probe can always cover the flaw detection area. Due to the wide coverage area, the weld can be scanned 5mm in and out to achieve full weld coverage bidirectional detection. The quality control accuracy of the flaw detection is better guaranteed. The transverse probe occupies a total of 6 channels. The equipment occupies a total of 12 channels.
The probe layout is shown in Figure 1:

In order to prevent the probe from being worn and minimize the direct contact between the probe and the welded pipe, the steel pipe enterprises and the flaw detection equipment production and research and development institutions jointly designed and studied the upgrade and improvement of the probe shoe and the probe cover.
In the upgrade of flaw detection equipment, most welded pipe manufacturers have adopted the control mode of offline flaw detection PLC + industrial computer to improve the control accuracy of the equipment and avoid the blind area of the pipe end. Most of the flaw detection systems use paired probes to achieve coupled monitoring. Two probes form a pair, symmetrically located on both sides of the weld, and have different triggering times.
One of them is triggered during the repetition frequency cycle, while the other is triggered after 1/2 of the repetition frequency cycle. If the coupling is good, one of the pair of probes should be able to receive the transmission signal of the other during the repetition frequency cycle. This "time-sharing mutual coupling monitoring" method can save the flaw detection speed and defect feedback time, monitor the defect location and size more accurately and timely, and improve the flaw detection efficiency.
2. Manual flaw detection of welds
The strict judgment of defects detected by offline weld flaw detection needs to be confirmed by manual flaw detection.
Before manual re-inspection and confirmation, the weld and the flaw detection surface should be inspected visually. The appearance quality should comply with the relevant standards. The shape of both sides of the weld and the flaw detection surface should not affect the detection of defects, otherwise it should be repaired and ground; the flaw detection inspector must check the detection equipment to see if the placement and direction of the instrument are correct, and whether the coupling agent and the detection joint are correct.
Before the manual re-inspection begins, the flaw detection equipment should be calibrated. After the first calibration, the second calibration should be carried out after 3 to 4 hours, and the flaw detection equipment should be calibrated again at the end of the inspection. After the weld position is aligned, the coupling agent (emulsion) is applied to both sides of the weld for formal flaw detection; for steel pipes that fail the weld flaw detection, the defects should be marked and detailed records should be made.
Summary
1. The leakage magnetic flaw detection has high sensitivity and can well distinguish the inner and outer wall defects of the welded pipe, but the long pipe body and thick wall pipe need to be demagnetized after the leakage magnetic flaw detection.
2. The eddy current flaw detection has a fast detection speed, but it is difficult to find defects deep in the workpiece due to the limitation of the skin effect.
3. Ultrasonic testing has the characteristics of strong penetration, accurate defect location, low cost and high speed, but the flaw detection operation requires coupling (it is recommended to use water film method instead of water immersion method for acoustic coupling) to detect. In the severe winter environment in the north, the coupled welded pipe is easy to freeze, which brings inconvenience to the flaw detection operation.
4. In the construction of new projects and the production of welded pipes, the flaw detection method, equipment selection and process technology should be comprehensively considered according to the characteristics of the welded pipes, quality requirements, implementation standards and enterprise economic conditions.




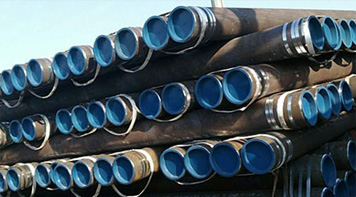 Eastern Steel Manufacturing Co.,Ltd not only improve product production and sales services, but also provide additional value-added services. As long as you need, we can complete your specific needs together.
