In industrial production and construction, mild
steel tube is favored for their good performance and wide application.
However, various defects may occur in carbon
steel pipe during production and use, which not only affect the quality and
performance of steel pipes, but may also cause safety hazards. Therefore, it is
crucial to accurately detect the defects of mild steel tubes. The following are
some detection methods for defects in mild steel tubes:
Appearance inspection
1. Visual observation
This is the most direct and simple
detection method. The inspector observes the surface of the mild steel tube
with the naked eye to see if there are obvious defects. For example, cracks,
folds, pits, scratches, etc. may appear on the surface of the steel pipe. For
some minor defects, a magnifying glass can be used to assist in observation. At
the welding site, carefully check whether the weld is flat, whether there are
pores, slag inclusions, etc.
2. Gauge measurement
Use tools such as calipers and micrometers
to measure the outer diameter, inner diameter, wall thickness and other
dimensions of the steel pipe. Through measurement, it can be determined whether
the size of the steel pipe meets the standard requirements, and it can also be
found whether the steel pipe has local deformation. For example, if the outer
diameter tolerance of a steel pipe is required to be ±0.5mm,
a caliper is used to perform multi-point measurements. If it exceeds this
range, there may be quality problems.
Nondestructive testing
1. Ultrasonic testing (UT)
Ultrasonic testing uses the characteristics
of reflection and refraction when ultrasonic waves propagate inside the steel
pipe and encounter defects. During testing, an ultrasonic probe is placed on
the surface of the steel pipe to emit ultrasonic waves into the steel pipe.
When the ultrasonic wave encounters defects such as cracks and inclusions, the
reflected waves are received and analyzed by the instrument to determine the
location and size of the defect. This method is suitable for detecting defects
at deeper locations inside the steel pipe, and has better detection effects for
mild steel tubes with thicker walls.
2. Magnetic particle testing (MT)
Magnetic particle testing is mainly used to
detect surface and near-surface defects of mild steel tubes. When the steel
pipe is magnetized, surface or near-surface defects will cause distortion of
magnetic lines of force. Spraying magnetic powder on the surface of the steel
pipe will gather at the defect, forming obvious magnetic marks, thereby showing
the location and shape of the defect. For mild steel tubes with tiny cracks on
the surface, magnetic particle testing can detect these defects very sensitively.
3. Radiographic testing (RT)
Radiographic testing includes X-ray and γ-ray testing. After the rays penetrate the steel pipe, an image is
formed on the film or detector. If there are defects inside the steel pipe,
such as pores, slag inclusions, etc., different degrees of grayscale changes
will be shown on the image, and the type, size and location of the defects can
be determined. However, radiographic testing has certain radiation hazards to
operators, and protective measures need to be taken, and the equipment cost is
relatively high.
4. Eddy current testing (ET)
When the alternating magnetic field is
close to the mild steel tube, eddy currents will be generated on the surface of
the steel pipe. If there are defects on the surface or near the surface of the
steel pipe, the distribution and size of the eddy current will change, and this
change will be measured by the detection coil to detect the defects. Eddy
current testing is fast and can realize automatic detection. It is mainly used
to detect defects on the surface and near the surface of the steel pipe, such
as cracks, holes, etc.
Physical and chemical properties testing
1. Tensile test
Through the tensile test, the mechanical
properties of mild steel tubes such as yield strength, tensile strength and
elongation can be tested. The steel pipe is processed into a standard tensile
specimen, stretched on a universal testing machine, and the stress-strain curve
is recorded to determine whether the steel pipe meets the strength and
toughness requirements. If the yield strength of the steel pipe is lower than
the standard value, plastic deformation may easily occur during use.
2. Hardness test
Hardness test can reflect the wear
resistance and strength of mild steel tubes. Commonly used hardness test
methods include Brinell hardness (HB), Rockwell hardness (HR) and Vickers
hardness (HV). Hardness test is performed on the end or side of the steel pipe.
If the hardness does not meet the standard range, it may indicate that the heat
treatment process of the steel pipe is improper or the material is uneven.
3. Chemical composition analysis
The chemical composition of mild steel
tubes is analyzed using equipment such as spectrometers to check whether the
content of elements such as carbon, silicon, manganese, phosphorus, and sulfur
meets the standard requirements. If the chemical composition is unqualified, it
may affect the performance of the steel pipe. For example, too high a carbon
content will increase the hardness of the steel pipe, but reduce its toughness.




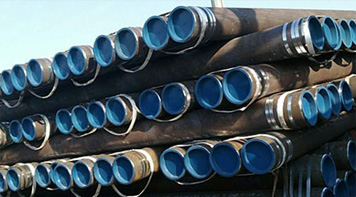 Eastern Steel Manufacturing Co.,Ltd not only improve product production and sales services, but also provide additional value-added services. As long as you need, we can complete your specific needs together.
