Quality defects of seamless perforated capillary tubes
Quality requirements for seamless pipes
Seamless pipe
1. Purpose: Seamless pipe is an economical cross-section steel that plays an important role in the national economy and is widely used in petroleum, chemical industry, boilers, power stations, ships, machinery manufacturing, automobiles, aviation, aerospace, energy, geology, construction and various sectors such as military industry.

2. Classification
① According to the cross-section shape: circular cross-section pipe, special-shaped cross-section pipe
②According to material:
carbon steel pipe, alloy pipe, stainless pipe, composite pipe
③According to the connection method: threaded connection pipe,
welded pipe
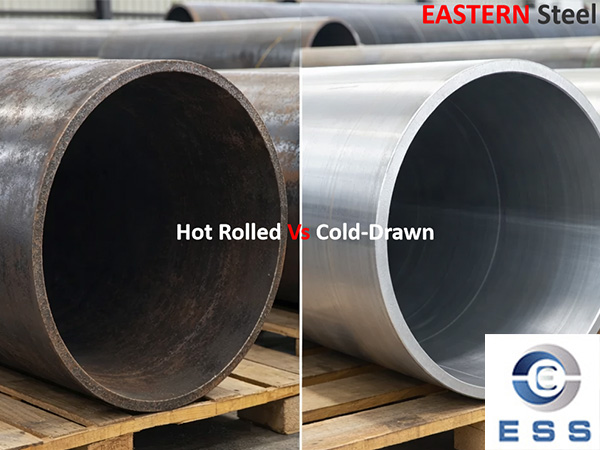
④According to production method: hot-rolled (extruded, topped, expanded) pipes, cold-rolled (drawn) pipes
⑤According to use: boiler pipes, oil well pipes, pipeline pipes, structural pipes, fertilizer pipes...
3. Production processes
①Main production processes of hot-rolled seamless pipes (△Main inspection processes):
Preparation and inspection of tube blank △ → Heating of tube blank → Punching → Pipe rolling → Reheating of waste pipe → Determining (reducing) diameter → Heat treatment △ → Straightening of finished pipe → Finishing → Inspection △ (non-destructive, physical and chemical, Taiwan inspection) → Input Library
②The main production processes of cold-rolled (drawn) seamless pipes:
Blank preparation→pickling and lubrication→cold rolling (drawing)→heat treatment→straightening→finishing→inspection
4. Quality requirements
①Chemical composition of steel: The chemical composition of steel is one of the most important factors affecting the performance of seamless pipes. It is also the main basis for formulating pipe rolling process parameters and pipe heat treatment process parameters.
a. Alloying elements: intentionally added, according to purpose
b. Residual elements: brought in from steelmaking, properly controlled
c. Harmful elements: strictly controlled (As, Sn, Sb, Bi, Pb), gases (N, H, O)
Out-of-furnace refining or electroslag remelting: improve the uniformity of the chemical composition of the steel and the purity of the steel, reduce non-metallic inclusions in the tube blank and improve its distribution pattern.
②pipe geometric dimension accuracy and shape
a. pipe outer diameter accuracy: depends on the diameter determination (reduction) method, equipment operation conditions, process system, etc.
Allowable deviation of outer diameter δ=(D-Di)/Di ×100%
D: Maximum or minimum outer diameter mm
Di: nominal outer diameter mm
b. pipe wall thickness accuracy: It is related to the heating quality of the tube blank, the process design parameters and adjustment parameters of each deformation process, the tool quality and its lubrication quality, etc.
Allowable deviation of wall thickness: ρ=(S-Si)/Si×100%
S: maximum or minimum wall thickness in cross section
Si: nominal wall thickness mm
c. pipe ovality: indicates the degree of out-of-roundness of the pipe.
d. pipe length: normal length, fixed (multiple) ruler length, length tolerance
e. pipe curvature: Indicates the radius of the pipe: curvature per meter of pipe length, curvature of the entire length of the pipe
f. pipe end face slope: Indicates the degree of inclination between the pipe end face and the pipe cross section
g. pipe end bevel angle and blunt edge
5. pipe surface quality: surface smoothness requirements
a. Dangerous defects: cracks, inward folds, outward folds, rolling breaks, delamination, scarring, dents, convex bulges, etc.
b. General defects: pockmarks, green lines, scratches, bruises, slight inside and outside straights, roller marks, etc.
cause:
① Caused by surface defects or internal defects of the tube blank.
② Caused during the production process, such as incorrect design of rolling process parameters, uneven mold surface, poor lubrication conditions, and unreasonable pass design and adjustment.
③ During the heating, rolling, heat treatment and straightening process of the tube blank (pipe), if excessive residual stress is generated due to improper heating temperature control, uneven deformation, unreasonable heating and cooling speed or excessive straightening deformation, then It may also cause surface cracks in pipes.
6. Steel management properties: normal temperature mechanical properties, high temperature mechanical properties, low temperature properties, corrosion resistance. The physical and chemical properties of pipes mainly depend on the chemical composition of the steel, the organizational structure and the purity of the steel, as well as the heat treatment method of the pipe.
7. pipe process performance: flattening, flaring, curling, bending, welding, etc.
8. Metallurgical structure of pipe: low-magnification structure (macro), high-magnification structure (micro) M, B, P, F, A, S
9. Special requirements for pipes: contract attachments and technical agreements.
Seamless pipe quality inspection methods:
1. Chemical composition analysis: chemical analysis method, instrumental analysis method (infrared C-S instrument, direct reading spectrometer, zcP, etc.).
① Infrared C-S meter: Analyze ferroalloys, steelmaking raw materials, and C and S elements in steel.
②Direct reading spectrometer: C, Si, Mn, P, S, Cr, Mo, Ni, Cn, A1, W, V, Ti, B, Nb, As, Sn, Sb, Pb, Bi in bulk samples
③N-0 meter: gas content analysis N, O
2. pipe geometric dimensions and appearance inspection:
① pipe wall thickness inspection: micrometer, ultrasonic thickness gauge, no less than 8 points at both ends and recorded.
② pipe outer diameter and ovality inspection: caliper, vernier caliper, ring gauge, measure the maximum point and minimum point.
③pipe length inspection: steel tape measure, manual and automatic length measurement.
④ pipe curvature inspection: Use a ruler, level (1m), feeler gauge, and thin wire to measure the curvature per meter and the curvature of the entire length.
⑤ Inspection of pipe end bevel angle and blunt edge: square ruler and clamping plate.
3. pipe surface quality inspection: 100%
① Manual visual inspection: lighting conditions, standards, experience, markings, pipe rotation.
②Non-destructive testing inspection:
a. Ultrasonic flaw detection UT:
It is sensitive to surface and internal crack defects of uniform materials of various materials.
Standard: GB/T 5777-1996 Level: C5
b. Eddy current flaw detection ET: (electromagnetic induction)
Mainly sensitive to point-like (hole-shaped) defects. Standard: GB/T 7735-2004
Level: B level
c. Magnetic particle MT and magnetic flux leakage inspection:
Magnetic flaw detection is suitable for detecting surface and near-surface defects of ferromagnetic materials.
Standard: GB/T 12606-1999 Level: C4
d. Electromagnetic ultrasonic flaw detection:
No coupling medium is required, and it can be used for surface flaw detection of high-temperature, high-speed, rough pipes.
e. Penetrant inspection:
Fluorescence, coloring, and detection of surface defects in pipes.
4. Steel management performance inspection:
① Tensile test: measure stress and deformation, and determine the strength (YS, TS) and plasticity index (A, Z) of the material
Longitudinal and transverse specimens, pipe sections, arc-shaped and circular specimens (¢10, ¢12.5)
Small diameter, thin wall, large diameter, thick wall, calibration distance.
Note: The elongation of the sample after breaking is related to the size of the sample GB/T 1760
②Impact test: CVN, notched C-type, V-type, work J value J/cm2
Standard sample 10×10×55 (mm) Non-standard sample 5×10×55 (mm)
③Hardness test: Brinell hardness HB, Rockwell hardness HRC, Vickers hardness HV, etc.
④Hydraulic test: test pressure, pressure stabilization time, p=2Sδ/D
5. pipe process performance inspection:
① Flattening test: round specimen C-shaped specimen (S/D>0.15) H= (1+2)S/(∝+S/D)
L=40~100mm Deformation coefficient per unit length=0.07~0.08
② Ring pull test: L=15mm, no cracks, it is qualified
③Expansion and curling test: top-center taper is 30°, 40°, 60°
④Bending test: can replace the flattening test (for large diameter pipes)
6. Metallurgical analysis of pipe:
①High-power inspection (microscopic analysis): non-metallic inclusions 100x GB/T 10561
Grain size: grade, grade difference
Organization: M, B, S, T, P, F, A-S
Decarburization layer: inner and outer
Method A rating: Class A - sulfide Class B - oxide Class C - silicate D - spherical oxidation DS class
②Low magnification test (macroscopic analysis): naked eye, magnifying glass 10x or less
a. Acid etching test method
b. Sulfur print inspection method (tube blank inspection, showing low culture structure and defects, such as looseness, segregation, subcutaneous bubbles, skinning, white spots, inclusions, etc.
c. Tower-shaped hairline inspection method: Check the number, length and distribution of hairlines.
Quality defects of perforated capillary tubes and their prevention
1. Perforation is the first process of deformation of hot-rolled seamless pipe, and it is also one of the most important deformation processes. Its function is to punch the solid tube blank into a hollow capillary tube. Perforation method: longitudinal rolling piercing, cross rolling piercing.
①Longitudinal rolling and piercing: pressure punching and push rolling piercing. The tube blank does not rotate.
② Cross-rolling perforation: two-roller type (cone type, barrel type, Mann type, disc type) with two rollers and two guide plates. Three-roller type: It consists of three rotating rollers forming a perforated pass pattern. The tube blank moves forward while rotating under the action of rollers.
2. Reasons for quality defects of perforated capillary tubes:
① Defects caused by defects in the tube itself or defects produced during the heating process of the tube.
② Produced during the perforation process, it is caused by incorrect design or adjustment of perforation process parameters, unreasonable shape of perforation tools, quality defects on the surface of perforation tools, etc.
3. The quality defects of perforated capillary tubes mainly include: uneven wall thickness of capillary tubes; inner straight channels and outer straight channels; surface scars and scratches; inward and outward folds, and separation layers.
Longitudinal rolling and piercing technology and quality defects
1. Process characteristics: The inner hole of the capillary tube is "pushed out" by the punching (pushing) head: pressure punching: vertical punching, horizontal punching; push-rolling piercing: cross-rolling. The punching deformation process of the tube blank is mainly completed under the state of three-dimensional compressive stress. Therefore, the looseness and shrinkage holes in the central part of the tube blank will be compacted. Therefore, the pressure punching process can improve the low pressure of the tube blank. times the structural defects to provide good quality punching blanks for the subsequent stretching process. For some high-alloy seamless pipe blanks with poor plasticity that are produced by the direct punching process, pressure punching can be performed first and then extended rolling.
2. Quality defects of longitudinally rolled and perforated capillary tubes and their prevention
① Uneven wall thickness of the punched (pierced) hole blank: caused by process reasons and uneven heating temperature.
Precaution:
a. The tube blank should be heated evenly (law of least resistance) to prevent serious burning damage.
b. Try to make the center line of the tube blank coincide with the center line of the punch (ejector pin). Pay attention to adjusting the punch (ejector pin) guide system so that the gap cannot be too large.
c. To prevent the ram (ram) from bending, ensure that it has sufficient bending strength.
d. The adjustment of the crosshead guide device of the pressure punching machine and the tube blank guide device of the push-rolling piercing machine must ensure the alignment and stability of the center line of the tube blank and the rolling center.
② Punch (pierce) the inner and outer straights of the hole blank:
a. Cause: The punch (punch) works in an extremely harsh high-temperature and high-pressure environment. Once the end is severely deformed or steel-sticks, the punch (punch) will produce damage relative to the inner surface of the tube blank. During the movement, the inner surface of the tube blank will be scratched to form an inner straight track.
b. Preventive measures: In order to prevent internal and external straight defects in the punching (piercing) hole blank, the cooling of the punch (head) and die (roller) should be strengthened to increase their service life. High-strength heat-resistant steel should be used to manufacture the punch. (Head), once stuck steel is found, it must be repaired or replaced in time.
③ Scratches on the outer surface of the punched (pierced) hole blank:
a. Cause: During push-rolling and piercing, the outer surface of the pierced blank is scratched because the tube blank passes through the conveyor roller table with a rough surface, or slides relative to the sticky steel or damaged roller.
b. Preventive measures: The inspection and maintenance of punching tools and rollers should be strengthened, and tools and workpieces that cannot meet process requirements should be replaced in a timely manner.
Cross-rolled perforation process and quality defects
1. Process characteristics: The cross-rolled perforation deformation zone can be divided into four zones according to its functions.
①Punch preparation area (roller bite section) to control the premature formation of inward folds in the tube blank cavity
②Perforated area (perforated section) to prevent scratches and cracks
③Rolling area (uniform wall section) The wall thickness accuracy of the capillary tube should be improved and the spiral should be eliminated.
④The rounding area (rounding section) prevents the guide plate from being scraped and scratched
2. Quality defects of cross-rolled and perforated capillary tubes and their prevention
① Inward folding of capillary tube: It is the most likely quality defect to occur in cross-rolling and piercing. It is closely related to the piercing performance of the tube blank, the adjustment of the hole shape and piercing process parameters of the piercing machine, and the quality of the piercing head. The cavity of the tube blank is one of the important factors causing the inward folding of the perforated capillary tube.
Important factors affecting capillary infolding:
a. The amount of pressing in front of the head and the number of times of compression
b. Hole shape
c. Top surface quality
②Outward folding of the capillary tube: mostly caused by surface defects of the tube blank
The main factors affecting the outward folding of capillary tubes:
a. The plasticity and surface quality of the tube blank itself
b. Perforation deformation and roll pass shape.
c. Surface quality of the perforation tool.
Measure:
a. Improving the heating quality of the tube blank and choosing the appropriate amount of perforation deformation will help reduce the occurrence of capillary folding defects.
b. Strengthening the inspection and cleaning of surface defects of tube blanks is the main measure to reduce outward bending defects of capillary tubes.
c. Improving the sealing properties of the hole and appropriately reducing the ovality of the hole will help reduce the occurrence of outward folding defects of the perforated capillary tube.
③ Uneven capillary wall thickness: divided into uneven transverse wall thickness and uneven longitudinal wall thickness
The main factors affecting the uneven capillary wall thickness:
a. Heating temperature of tube blank
b. Pipe end centering
c. Hole pattern adjustment of punching machine
d. Tool shape
④ Scratches on the surface of the capillary tube: It is mainly caused by serious wear and tear on the surface of the piercing tool or the exit roller of the piercing machine, which is not smooth or the roller does not rotate.
Measures: The inspection and grinding of piercing tools should be strengthened, and tools that do not meet quality requirements should be replaced in time.




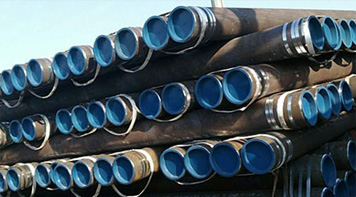 Eastern Steel Manufacturing Co.,Ltd not only improve product production and sales services, but also provide additional value-added services. As long as you need, we can complete your specific needs together.
