The mechanical properties of smls pipe are important indicators to ensure the final use performance (mechanical properties) of the steel, and it depends on the chemical composition of the steel and the heat treatment system. In the steel pipe standard, according to different application requirements, the tensile properties (tensile strength, yield strength or yield point, elongation), hardness, toughness indicators, and high and low temperature properties required by users are specified.

①Tensile strength (σb)
In the tensile process, the maximum force (Fb) that the sample bears when it breaks, divided by the original cross-sectional area (So) of the sample, is the stress (σ), which is called the tensile strength (σb), and the unit is N/mm2 (MPa). It represents the maximum ability of a metal material to resist damage under tensile force.
②Yield point (σs)
For a metal material with a yield phenomenon, the stress at which the sample can continue to elong without increasing the force (maintaining constant) during the stretching process is called the yield point. If the force drops, the upper and lower yield points should be distinguished. The unit of yield point is N/mm2 (MPa).
Upper Yield Point (σsu): The maximum stress before the specimen yields and the force drops for the first time; Lower Yield Point (σsl): The minimum stress in the yield stage when the initial transient effect is not taken into account.
The calculation formula of the yield point is: σs=Fs/So
Where: Fs--yield force (constant) during the tensile process of the sample, N (Newton) So--the original cross-sectional area of the sample, mm2.
③Elongation after breaking (σ)
In the tensile test, the percentage of the length of the gauge length increased after the sample is broken to the original gauge length is called the elongation. Expressed by σ, the unit is %. The calculation formula is: σ=(Lh-L0)/L0*100%
In the formula: Lh-the gauge length of the specimen after breaking, in mm; L0-the original gauge length of the specimen, in mm.
④Reduction of area (ψ)
In the tensile test, the percentage of the maximum reduction of the cross-sectional area at the reduced diameter of the sample after the sample is broken to the original cross-sectional area is called the reduction of area. Expressed in ψ, the unit is %. The calculation formula is as follows: ψ=(S0-S1)/S0*100%
In the formula: S0-the original cross-sectional area of the sample, mm2; S1-the minimum cross-sectional area at the reduced diameter of the sample after it is broken, mm2.
⑤ Hardness index
The ability of metal materials to resist the indentation of hard objects on the surface is called hardness. According to different test methods and scope of application, hardness can be divided into Brinell hardness, Rockwell hardness, Vickers hardness, Shore hardness, micro hardness and high temperature hardness. There are three commonly used pipes: Brinell, Rockwell, and Vickers hardness.
A. Brinell hardness (HB)
Use a steel ball or cemented carbide ball of a certain diameter to press into the surface of the sample with the specified test force (F), remove the test force after the specified holding time, and measure the indentation diameter (L) on the surface of the sample. The Brinell hardness value is the quotient obtained by dividing the test force by the spherical surface area of the indentation. Expressed in HBS (steel ball), the unit is N/mm2 (MPa).
The measurement of Brinell hardness is more accurate and reliable, but generally HBS is only suitable for metal materials below 450N/mm2 (MPa), and is not suitable for harder steel or thinner plates. Among the steel pipe standards, Brinell hardness is the most widely used, and the hardness of the material is often expressed by the indentation diameter d, which is intuitive and convenient.
For example: 120HBS10/1000/30: It means that the Brinell hardness value measured by holding a steel ball with a diameter of 10mm under a test force of 1000Kgf (9.807KN) for 30s (seconds) is 120N/mm2 (MPa).




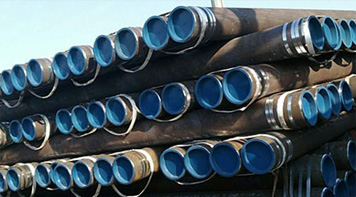 Eastern Steel Manufacturing Co.,Ltd not only improve product production and sales services, but also provide additional value-added services. As long as you need, we can complete your specific needs together.
