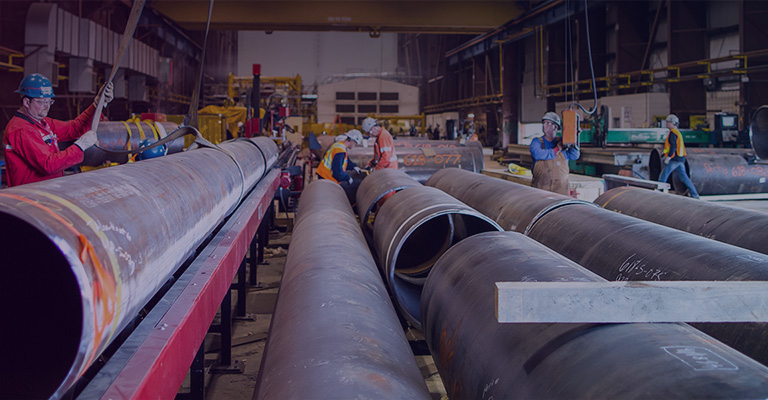
Manual inspection is a crucial step in
ensuring the consistency of mild
steel pipe quality and is a mandatory quality control procedure before
pipe delivery. This guide is optimized and streamlined based on commonly used
international steel pipe standards (such as ASTM A53, ASTM A106, EN
10210, EN 10216, API 5L) and factory inspection systems, and can serve
as a reference for enterprise quality control, third-party inspection, and
overseas customer technical audits.
Preparation Before Inspection
1. Preparation of Inspection Tools and
Marking Materials
The on-duty inspector should prepare the
paint and high-temperature resistant chalk required for inspection and grade
marking for application.
Check that the external surface lighting
and internal surface inspection lights are functioning properly. Inspection
must not be carried out at night if the external surface inspection lighting is
not turned on.
2. Inspection of Measuring Tools
Check measuring tools such as vernier
calipers and micrometers, confirming that the measuring tools are within their
specified calibration validity period and that the zero points of the
micrometer and vernier calipers are aligned.
3. Document Preparation
Subsequent inspectors should carefully
review work records to understand major quality issues and outstanding
problems; carefully review production plans, process notices, or relevant
standards to understand the steel pipe types, specifications, and quality
requirements for this level of inspection.

1. Process Card Verification
Before inspecting each batch of steel
pipes, a production process card returned from the finished product processing
area is required.
2. Comparison with Contract & Plan
Inspectors must verify that the production
process card is consistent with the production plan, physical contract number,
batch number, standard, specification, and steel type. If there is any
discrepancy, the foreman of the finished product processing area in the special
seamless steel pipe plant should be contacted to clarify the cause. If there is
no discrepancy, no verification is required.
Mild Steel Pipe Inspection Items and
Methods
1. Visual Inspection of External Surface
According to the requirements of relevant
standards, visually inspect the quality of the external surface of each steel
pipe; using an internal surface inspection lamp, visually inspect the quality
of the internal surface of each steel pipe according to the requirements of
relevant standards.
2. Measurement of Steel Pipe Outer Diameter
and Wall Thickness
Use vernier calipers to measure the outer
diameter of the steel pipe at the pipe end. The two outer diameter values, D1
and D2, should be perpendicular to each other.
Use a micrometer to measure the wall
thickness of the steel pipe at the pipe end, measuring the wall thickness at
four evenly spaced points. (D1 and D2 are the two outer diameter values; S1,
S2, S3, and S4 are the wall thickness values at the
four points.)
3. Visual Inspection of Bending Degree
When steel pipes need to be bent, the
degree of bending must be visually inspected.
If a row of steel pipes is pressed
together, and the pipe body shows obvious bending and gaps, production
personnel should be notified, and the bent steel pipes should be removed for
correction or scrapped.
If the degree of bending is not severe but
there are objections, the steel pipes should be removed, and the degree of
bending should be measured using a wire drawing method or a ruler method.
Mild Steel Pipe Quality Inspection
Marking
1. Marking of End-Cutting Areas
For steel pipes requiring end-cutting and
repair, when the removal portion is within 0.6 meters of the end, a line should
be drawn on the section to be cut using high-temperature resistant chalk, and
the defect name should be marked. The cut should be drawn as a dashed line,
covering the entire cylindrical surface of the pipe section as much as
possible.
2. Marking of End Defects >0.6m
When the end defect to be removed is
greater than 0.6 meters from the end, a zigzag line should be drawn on the pipe
end using high-temperature resistant chalk, and the cutting location and defect
name should be marked with an arrow. The zigzag line should cover the entire
cylindrical surface of the pipe section as much as possible.
3. Scrap Marking
For scrap products, mark “Ä” and the defect name within 0.5 meters of
the pipe end.
5. Repaired Product Marking
For inspected repaired products, a “™” mark can be drawn on the repaired defect. After the repaired and
grounded product passes inspection, a “V” mark can be added by the team. If the repaired and grounded product
fails to meet standards, mark it with "™" at
0.5 meters from the pipe end and then mark it with "Ä" before
disposing of it as waste.
6. Re-inspection
Steel pipes that have been re-cut, ground,
and straightened should be re-inspected.
Random Sampling Frequency of Mild Steel
Pipe Geometric Dimensions
When receiving and replacing the first 10
steel pipes according to specifications, their geometric dimensions must be
measured at the specified measurement points. After approximately half of the
steel pipes in each batch have been inspected, the geometric dimensions of 10
steel pipes should be randomly selected for measurement. The recorded geometric
dimension values for each batch of steel pipes should not be less than 60 values from 10 branch pipes.
Completion of Quality Records
For each batch of steel pipes that has been
inspected or is awaiting delivery but has not yet been inspected, a
"Finished Product (Semi-finished Product) Inspection Record" must be
completed.
The handwriting should be clear and legible
when filling out the record, and no alterations are allowed. The recorded data
should be accurate, and geometric dimensions should be measured randomly.
The data should be recorded together with
the inspection results, and no remarks should be added. The person who modifies
the record should sign it.
Inspection records are collected
periodically by the site statistician or assessor and are then compiled and
archived by the statistician.
Transmission of Abnormal Quality
Information
When inspectors discover that the same
defect persists, they should promptly notify the shift supervisor, requesting
them to investigate the cause and eliminate the fault.
FAQ
1. Why do mild steel pipes require manual
inspection?
Manual inspection can detect minute surface
defects (such as microcracks, indentations, pits, scratches, and oxide scale)
that are difficult to identify with automatic detection.
Furthermore, manually measuring dimensions
such as outer diameter, wall thickness, and curvature ensures that the steel
pipes meet international standards such as ASTM, EN, and API.
2. What items are mainly checked during
manual inspection?
Manual inspection typically includes the
following items:
External Visual Inspection,
Internal Visual Inspection,
Outer Diameter Measurement,
Wall Thickness Measurement,
Straightness, Ovality, and Pipe End
Condition Inspection.
Conclusion
Manual inspection is a crucial step in
ensuring that mild steel pipes meet international standards. Through
standardized inspection procedures, clear labeling methods, and a systematic
sampling inspection system, the stability of finished product quality can be
effectively improved, increasing the trust and acceptance rate of export
customers.
Read more: Difference between mild steel pipe and carbon steel pipe




 Eastern Steel Manufacturing Co.,Ltd not only improve product production and sales services, but also provide additional value-added services. As long as you need, we can complete your specific needs together.
