The surface quality inspection of
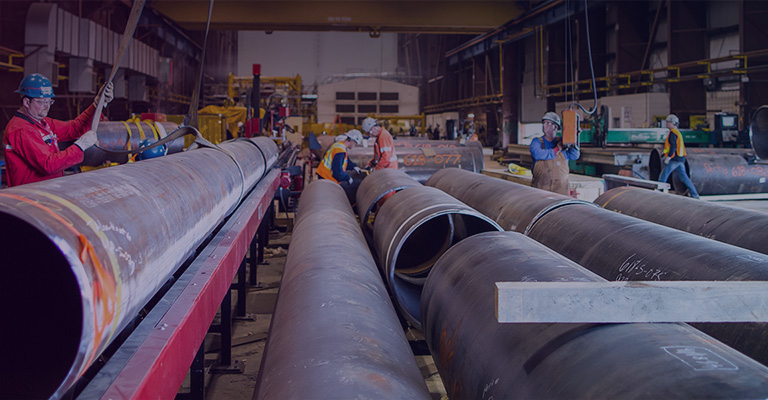
samless pipe mainly includes manual visual inspection and non-destructive inspection. During the manual visual inspection, sufficient lighting conditions should be provided. According to the standards and the experience of the inspectors, various defects of the steel pipe found are marked on the pipe body with special symbols. During the inspection process, the steel pipe needs to be rolled slowly. The non-destructive testing method refers to the method of detecting the surface or internal defects of the steel pipe with electromagnetic or ultrasonic equipment without damaging the integrity of the steel pipe.
Whether it is manual visual inspection or non-destructive testing, once a steel pipe defect is found that is not allowed to exist in the steel pipe standard or technical conditions but can be eliminated by grinding, the defect should be ground, and the steel pipe wall should not be ground after grinding. Exceeds the allowable negative deviation specified by the standard. If the steel pipe defects exceed the steel pipe standards or technical conditions, or the steel pipe whose wall exceeds the allowable depth after grinding, the defect and out-of-tolerance part shall be removed or the steel pipe shall be rejected.
There are many methods of non-destructive testing. At present, the methods mainly used in the surface quality inspection of seamless steel pipes include ultrasonic testing, eddy current testing, magnetic particle testing, magnetic flux leakage testing, electromagnetic ultrasonic testing, and penetration testing. Due to the different physical basis of each inspection method, different non-destructive testing methods have different detection sensitivities for different types of steel pipe defects, and each has its own advantages and disadvantages. For example, eddy current inspection, magnetic particle inspection, magnetic flux leakage inspection and other methods are most suitable for detecting defects on or near the surface of steel pipes. Penetration inspection is limited to the inspection of opening defects on the surface of steel pipes; while magnetic particle inspection, logistics inspection, and magnetic flux leakage inspection belong to magnetic inspection. Only limited to the inspection of ferromagnetic materials.
Among the above flaw detection methods, eddy current flaw detection is mainly sensitive to point-shaped (hole-shaped) defects; other flaw detection is sensitive to existing (crack) flaws; while ultrasonic flaw detection is more rapid and sensitive to surface and internal flaws, but is quantitative for steel pipe flaws Or qualitative analysis still has certain difficulties, and ultrasonic detection is also limited by the shape and grain size of the steel pipe. therefore. No non-destructive testing method is perfect, and the various methods should be complementary and cannot be replaced. Therefore, according to the differences in product technical requirements, different steel pipe standards stipulate corresponding steel pipe inspection items and non-destructive testing methods.

(1) Ultrasonic flaw detection
Ultrasonic flaw detection is based on the reflection, refraction and transmission characteristics of ultrasonic waves reaching the interface of two media with different acoustic impedances to detect whether there is a defect in the steel pipe. Ultrasonic flaw detection is sensitive to the surface and internal crack defects of various materials with uniform materials.
(2) Eddy current flaw detection
Eddy current flaw detection is based on electromagnetic induction. The alternating voltage generator supplies the excitation current to the detection coil, and the eddy current in the test piece generates its own magnetic field. The function of the eddy current magnetic field is to weaken and cancel the excitation magnetic field, and the degree to which it weakens and cancels the excitation magnetic field depends on various factors such as whether the eddy current has defects in the steel pipe during its passage. The detection coil detects the alternating signal of the eddy current magnetic field and sends it to the instrument for processing, so as to achieve the purpose of steel pipe flaw detection.
(3) Magnetic particle inspection and magnetic flux leakage inspection
Magnetic particle inspection and magnetic flux leakage inspection belong to magnetic inspection. The flaw detection principle is that when the magnetic steel pipe is magnetized, the defect sections on the surface and near the surface will leak part of the magnetic field on the surface of the steel pipe due to blocking the magnetic flux, forming a leakage magnetic field, which is detected by magnetic powder or magnetic detection elements , in order to detect whether the steel pipe has defects and the size of the defects. Magnetic flaw detection is suitable for the detection of surface and near-surface defects in ferromagnetic materials. The sensitivity of magnetic particle inspection is higher than that of magnetic flux leakage inspection, but the detection element of magnetic leakage inspection has a fast response speed, which is more suitable for on-line automatic inspection of steel pipes.
Magnetic particle inspection and magnetic flux leakage inspection are collectively referred to as magnetic flux leakage inspection. Physically speaking, they belong to the same detection method, which is used for flaw detection of ferromagnetic materials, all of which are detected by leakage magnetic field to find defects in materials.
One of the magnetic leakage detection methods in the magnetic particle inspection room is widely used in practice, and the use of detection elements to determine the existence of magnetic leakage is another method of magnetic leakage detection. In recent years, pipes and bars in the metallurgical industry have been It is more and more used in flaw detection, and this flaw detection method is often referred to as magnetic flux leakage flaw detection.
Magnetic particle inspection of seamless steel pipes is generally used for the inspection of the undetectable area of the pipe end that exists in the automatic inspection equipment, that is, the inspection of the pipe end. Generally, the fluorescent magnetic particle inspection method is used to perform longitudinal and axial magnetization of the pipe end within about 300mm. Generally, magnetization is used. The coil magnetizes the steel pipe longitudinally, the mandrel is energized to magnetize the steel pipe axially, and a composite magnetic field is formed to inspect the defects in all directions on the inner and outer surfaces and near the surface. The magnetization and demagnetization of the equipment adopts automatic control technology, and is observed manually under the irradiation of ultraviolet light source Display of magnetic marks on the inner and outer surfaces. The method adopts the fluorescent magnetic particle flaw detection method, which has the advantages of high detection sensitivity, simple operation, convenient, intuitive detection results, no blind area in the detection range, high degree of automation, and fast inspection speed. The production capacity can match the production capacity of the previous automatic flaw detection equipment, but since the magnetic marks need to be observed by the human eye, the inspection quality and reliability depend entirely on human factors.
The magnetic flux leakage detection of seamless steel pipes realizes the detection of defects by using sensors to detect the leakage magnetic fields of defects. The relative motion state of the sensors and the steel pipe to be detected is used to cut the magnetic lines of force, and the defect signals are obtained after processing by electronic instruments. Magnetic flux leakage testing equipment is generally composed of magnetizing power supply, magnetizing coil (yoke), detection probe, probe rotating device (or steel pipe rotating device), demagnetization (transverse flux leakage needs to be demagnetized), marking and other devices.
Magnetic flux leakage testing is generally divided into longitudinal magnetic flux leakage testing equipment and transverse magnetic flux leakage testing equipment. The longitudinal magnetic flux leakage testing equipment applies circumferential magnetization to the steel pipe to detect longitudinal defects on the inner and outer surfaces and near-surface of the steel pipe; Transverse magnetization is applied to detect transverse defects on the inner and outer surfaces and near surfaces of the steel pipe.
Magnetic flux leakage detection has the following advantages:
Easy to automate
Has high detection reliability
Preliminary assessment of defects possible
Efficient and pollution-free
At the same time, the magnetic flux leakage detection also has the improvement effect of electromagnetic flaw detection, which affects the sensitivity of flaw detection. If the contact method is used for flaw detection, the wear of the probe will affect the detection sensitivity.
(4) Electromagnetic ultrasonic flaw detection
Electromagnetic ultrasonic flaw detection is that the excitation coil excites eddy currents in the conductive specimen through alternating current. The eddy current is a high-frequency alternating current. Under the action of another external magnetic field, the charged particles in the eddy current are affected by the Loren magnetic force, and also alternately change, resulting in vibration, thereby generating ultrasonic waves in the test piece to detect the steel pipe. Defects. Its characteristic is that it does not need coupling medium and can be used for high temperature, high speed and rough surface flaw detection of steel pipes.
(5) Penetration inspection Penetration inspection includes fluorescence and coloring.
Because the penetrant inspection equipment is simple and easy to operate, it is an effective method to detect the surface defects of steel pipes to make up for the lack of magnetic particle inspection. Fluorescent flaw detection is to put the steel pipe into the fluorescent liquid, and use the capillary phenomenon existing in the defects of the steel pipe to absorb the fluorescent liquid in the surface defects of the steel pipe. After the fluorescent liquid on the surface of the steel pipe is removed, due to the fluorescent effect, the fluorescent liquid in the defects on the surface of the steel pipe will emit visible light under the irradiation of ultraviolet rays, thereby revealing the defects on the surface of the steel pipe. The principle of coloring flaw detection is similar to that of fluorescent flaw detection. It does not require special equipment. It only uses imaging powder to adsorb the coloring liquid adsorbed in the steel pipe defect to the surface of the steel pipe to reveal the location and shape of the defect.
Read more : How to test seamless carbon steel pipe?




 Eastern Steel Manufacturing Co.,Ltd not only improve product production and sales services, but also provide additional value-added services. As long as you need, we can complete your specific needs together.
