Here are the steps and key points for long
time welding of heat
exchanger tube:
Preparation before welding
1. Tube and tube sheet cleaning:
Thoroughly clean the surfaces of the heat
exchanger tubes and the tube sheet to be welded. Remove any oxides, oils and
dirt. For example, you can use a wire brush or a chemical cleaner suitable for
the material. For stainless steel tubes and tube sheets, an acid pickling
solution can be used to clean and passivate the surface.
2. Tube alignment:
Make sure the tube is properly aligned with
the hole in the tube sheet. The fit should be precise to ensure good weld
penetration and a proper joint. Use alignment tools such as tube expanders or
clamps to hold the tube in the correct position. This helps to maintain a
consistent gap between the tube and the tube sheet while welding.
Welding method selection
1. TIG (Tungsten Inert Gas) welding:
TIG welding is often used for heat
exchanger tubes because it allows precise control of heat input and produces
high-quality, clean welds. It is suitable for a variety of tube materials,
including stainless steel and titanium.
The welding gun is held at an appropriate
angle (usually around 70 - 80 degrees to the tube sheet surface) to direct the
arc and filler metal (if used) into the joint. Pure argon shielding gas is used
to protect the weld pool from atmospheric contamination, which is essential to
achieve good weld quality and corrosion resistance.
2. MIG (Metal Inert Gas) welding:
MIG welding can also be used for
thick-walled tubes or when higher welding speeds are required. However, it may
produce more spatter than TIG welding.
The correct wire feed speed and welding
voltage need to be set according to the tube material and thickness. For
example, for carbon steel tubes, the appropriate wire feed speed and voltage
combination can be determined through trial welds to achieve proper penetration
and weld bead formation.
Welding process
1. Weld penetration:
Achieve proper weld penetration to ensure a
strong joint. Penetration should generally reach the full thickness of the tube
sheet without excessive burn-through. This requires careful control of welding
current and speed. For example, when TIG welding a thin-wall stainless steel
tube to a tube sheet, a welding current of about 80 - 120 amps may be used,
depending on the diameter and thickness of the tube.
2. Use of filler metal:
If a filler metal is required (such as when
welding dissimilar materials or establishing a weld bead), select a filler
metal that is compatible with the tube and tube sheet materials. Filler metals
should have similar mechanical and chemical properties to ensure good weld
integrity. For example, when welding a nickel alloy tube to a carbon steel tube
sheet, a nickel-based filler metal may be selected to prevent galvanic
corrosion and ensure a strong joint.
3. Weld bead formation:
The weld bead should be smooth and free of
cracks, pores, and undercuts. The welder needs to move the welding gun at a
constant speed to form a uniform weld bead. In TIG welding, filler metal (if
used) should be added in a controlled manner to form a well-shaped weld bead.
The width and height of the weld bead should meet the design and quality
requirements of the heat exchanger.
Post-weld inspection and quality control
1. Visual inspection:
After welding, perform a visual inspection
of the weld. Check for any surface defects such as cracks, porosity, lack of
fusion or spatter. The weld should have a consistent color and appearance. Any
visible defects should be repaired or re-welded.
2. Nondestructive testing:
Internal defects in welds are detected
using nondestructive testing methods such as dye penetrant testing, magnetic
particle testing (for ferromagnetic materials) or ultrasonic testing. These
methods can identify subsurface cracks, voids or lack of fusion that may not be
visible to the naked eye. For example, in dye penetrant testing, a colored
penetrant is applied to the surface of the weld and after a certain dwell time,
the excess penetrant is removed. A developer is then applied and any penetrant
that has penetrated the defect is drawn out and becomes visible, allowing
cracks or porosity to be detected.
3. Hydrostatic or pneumatic testing:
Hydrostatic or pneumatic testing is performed
to check the integrity of welded pipes. In a hydrostatic test, the heat
exchanger is filled with water (or a suitable liquid) and pressurized to a
specified pressure (usually higher than the operating pressure). The pipe and
welds are then checked for any leaks. Pneumatic testing can also be performed
using air or inert gas, but requires greater caution due to the potential
energy stored in the pressurized gas.




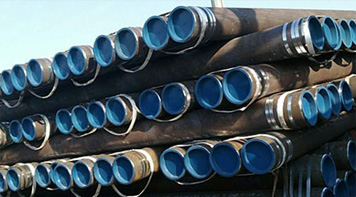 Eastern Steel Manufacturing Co.,Ltd not only improve product production and sales services, but also provide additional value-added services. As long as you need, we can complete your specific needs together.
